
Let's build our Mini Pizza Oven Kit. We hope you're ready for this delicious project! Be sure to scroll all the way down for the build video.

Each kit includes:
- 100 Red Bricks
- 4 Half Bricks
- 46 Full Cinderblocks
- 1 Cement Counter top
- 1 Jar of Mortar
- 1 Black Plastic Frame

Start by mortaring the plastic frame. A thin layer on the top, bottom, and back sides is all you need.

Next, place your frame onto the slab. We like to place it a little closer to the back, but make sure you leave the distance of a brick on all sides.

Now you are ready to start laying down the red bricks. Using a little mortar, create a thin even line across the bricks. The bricks should line up with the front and back of the frame. The process is similar to icing a cake, and you don't need a lot of mortar between layers.
Repeat up one side until you are about two layers from the top.
Switch to the other side.

Then finish the top. Complete the chimney. We suggest alternating the brick spacing by half a brick on each row.

Lay a row of 5 bricks across the back. You can go free style or follow our example of 3 layers of 5 bricks wide, 2 layers of 4 bricks wide, and one layer of three bricks wide.
Next trace a square using the cement countertop. Using 8 cinder blocks create a "U" shape following three edges of the square. Don't forget to start with a half block on every other row. You don't need to fill in the interiors of the blocks with mortar- just a thin layer on top. Build 5 layers.

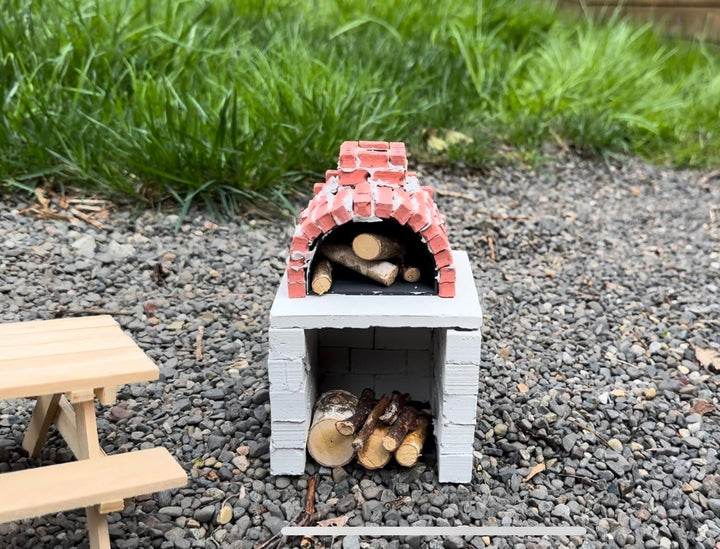
Place the red brick structure on the cinder block base. Success!

Now let's see that in action!